A large draw of the Canning Stock Route was the sheer space we’d be riding through. Latterly in the 2 year run-up to this trip it’s fair to say that the prospect of trying to communicate the country and our journey in images often took more prominence in my thoughts than the bicycle or details of the route.
Here’s I’ll relate some of the challenges there were to achieve what(ever) I have; in terms of light, terrain and the obvious limitations imposed by the need to carry 35 days food and up to 4 days water.
Camera and Lens reasoning

There are lots of ways of going ‘lighter’, but I chose a m43 mirrorless interchangeable lens camera with a less modern and imposing design plus the ability to have all the functions I wanted to use set by button or dial rather than the touch-screens that are on the increase.
For the trip, with regard to lenses, I wanted to cover landscapes, close-ups and zoom. I wanted to be able to work in low light and I had vague notions about getting some video footage too. While I will admit (in retrospect) that I would do things differently if anyone ever persuaded me to cycle the CSR again, I got nearly all the shots I had time and energy for. Some of them even came close to showing what it was really like.
After much searching I decided to use a Brunton Solaris 12 solar panel (12V/12W output) for charging, via the female car charger lead supplied. This (in theory) allowed me to use the 3rd party chargers available for my camera battery.
Photography kit list
- Olympus OMD EM5 body
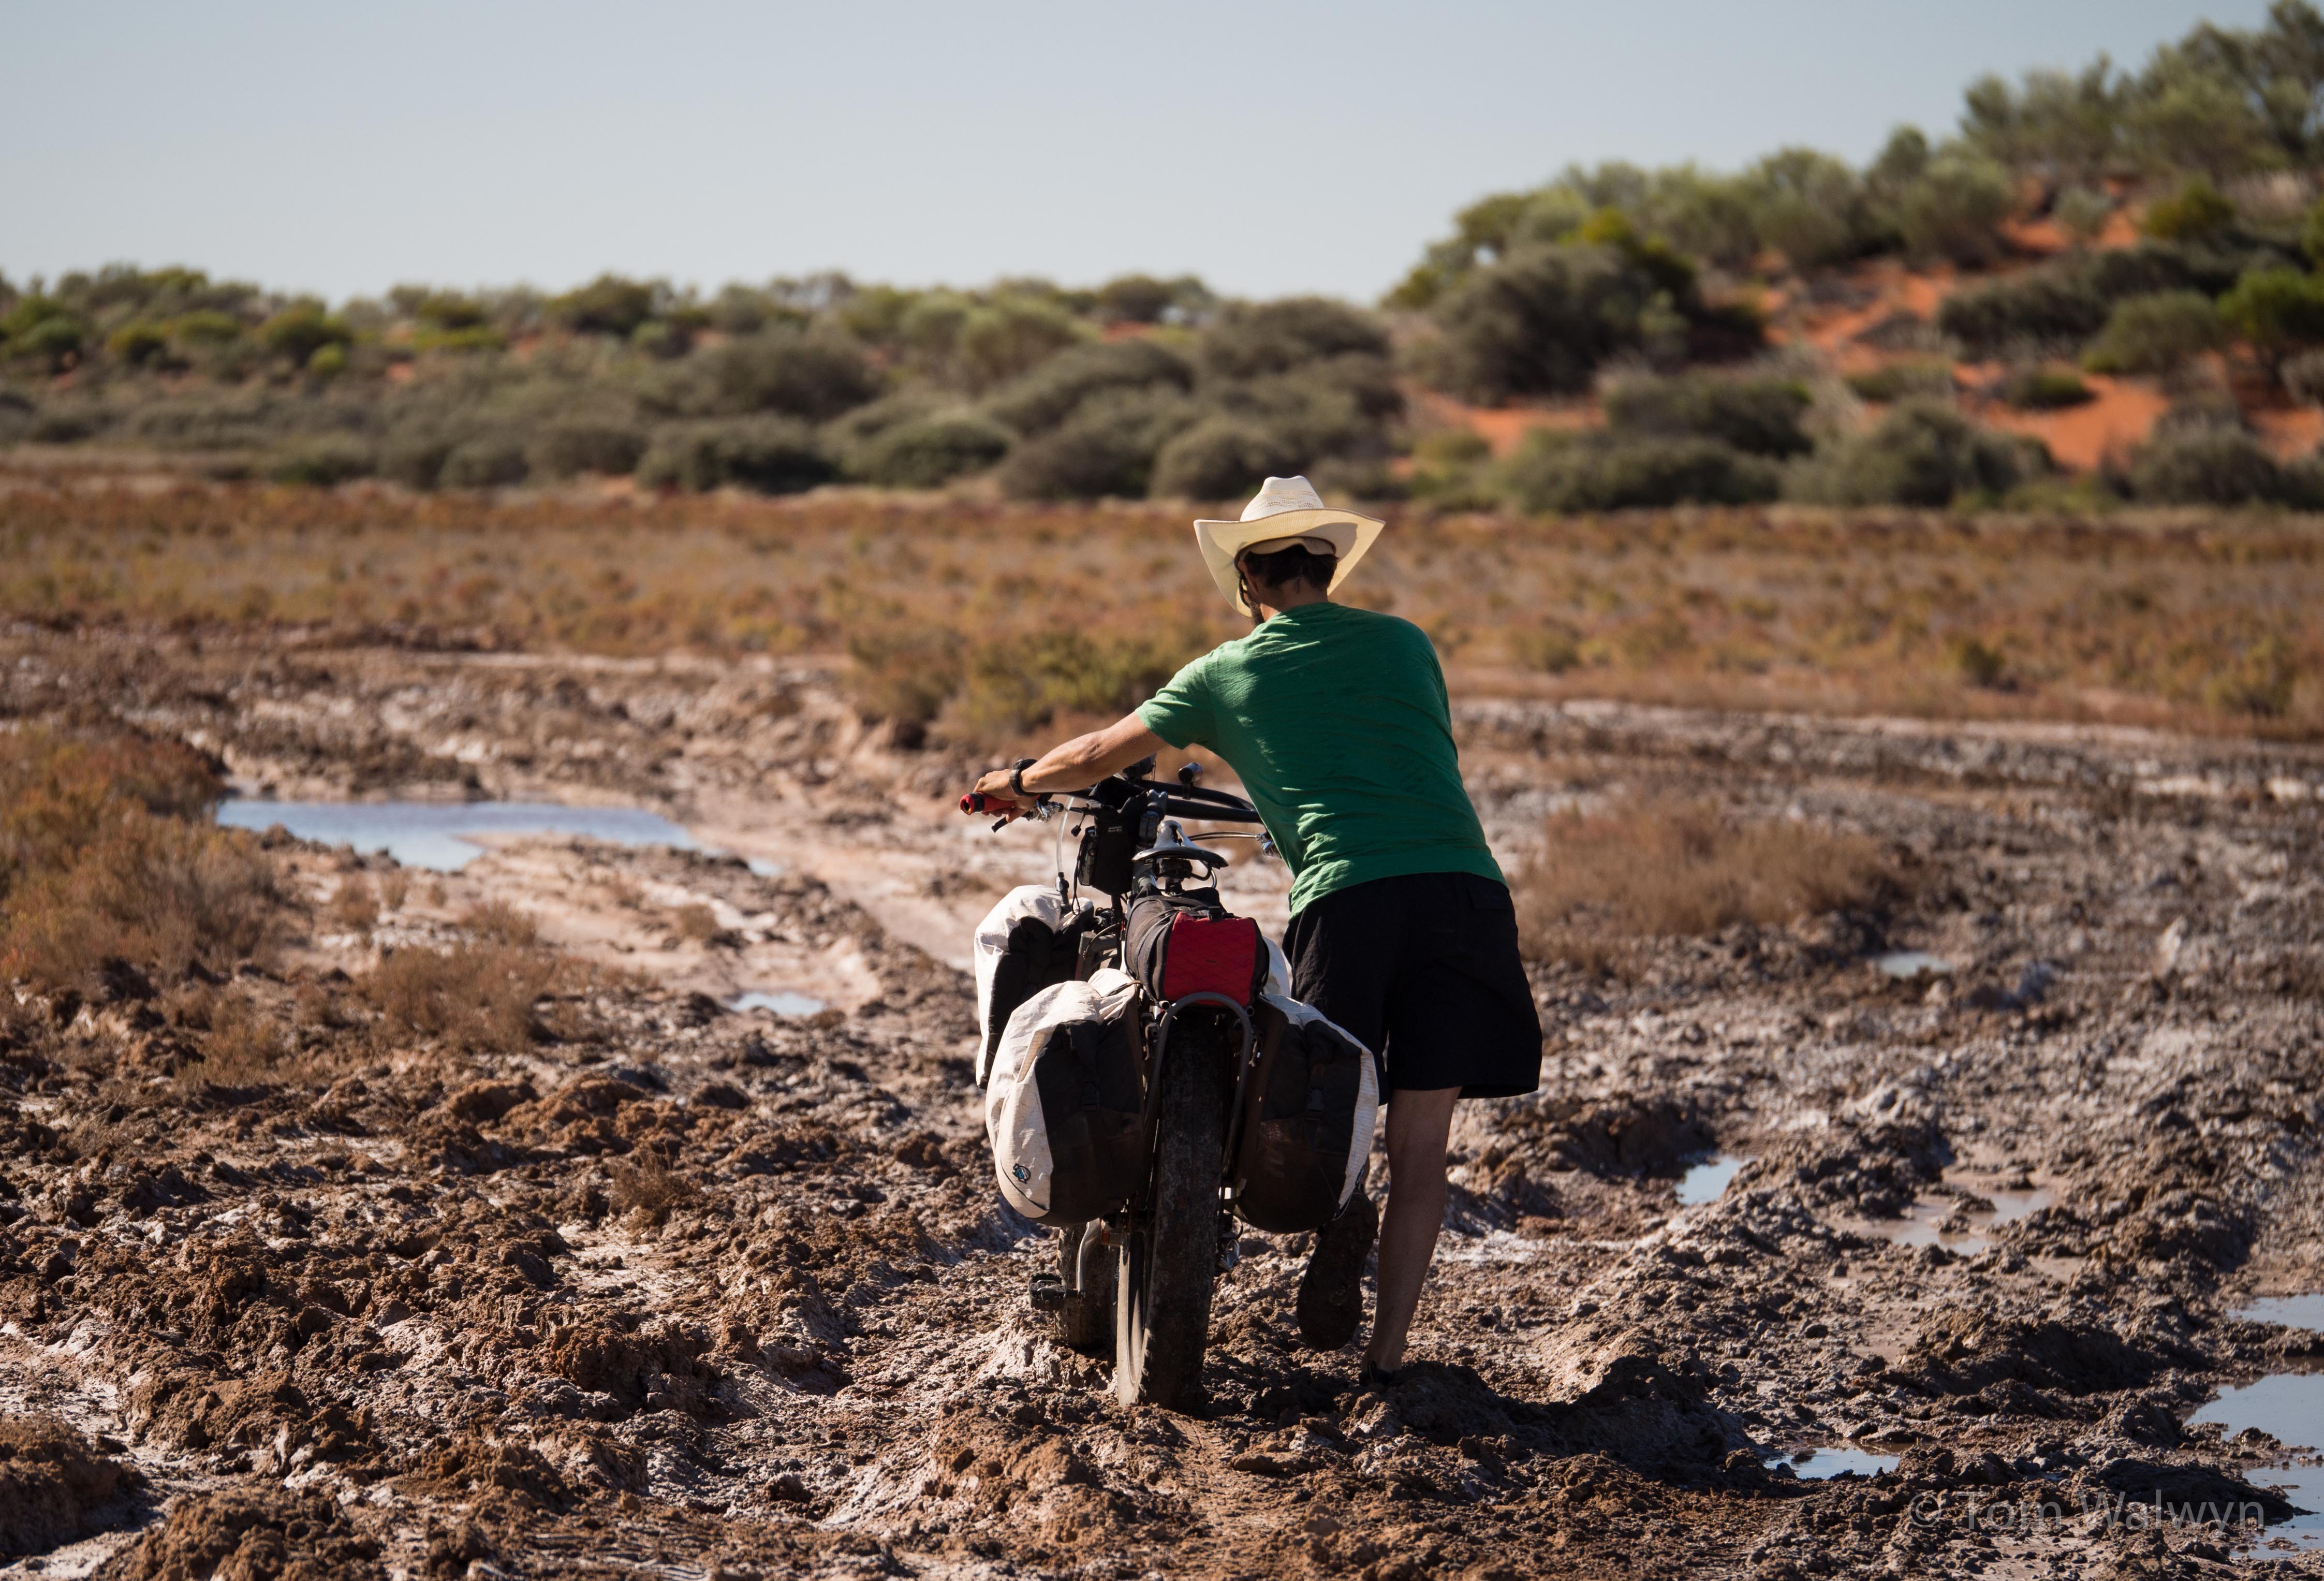
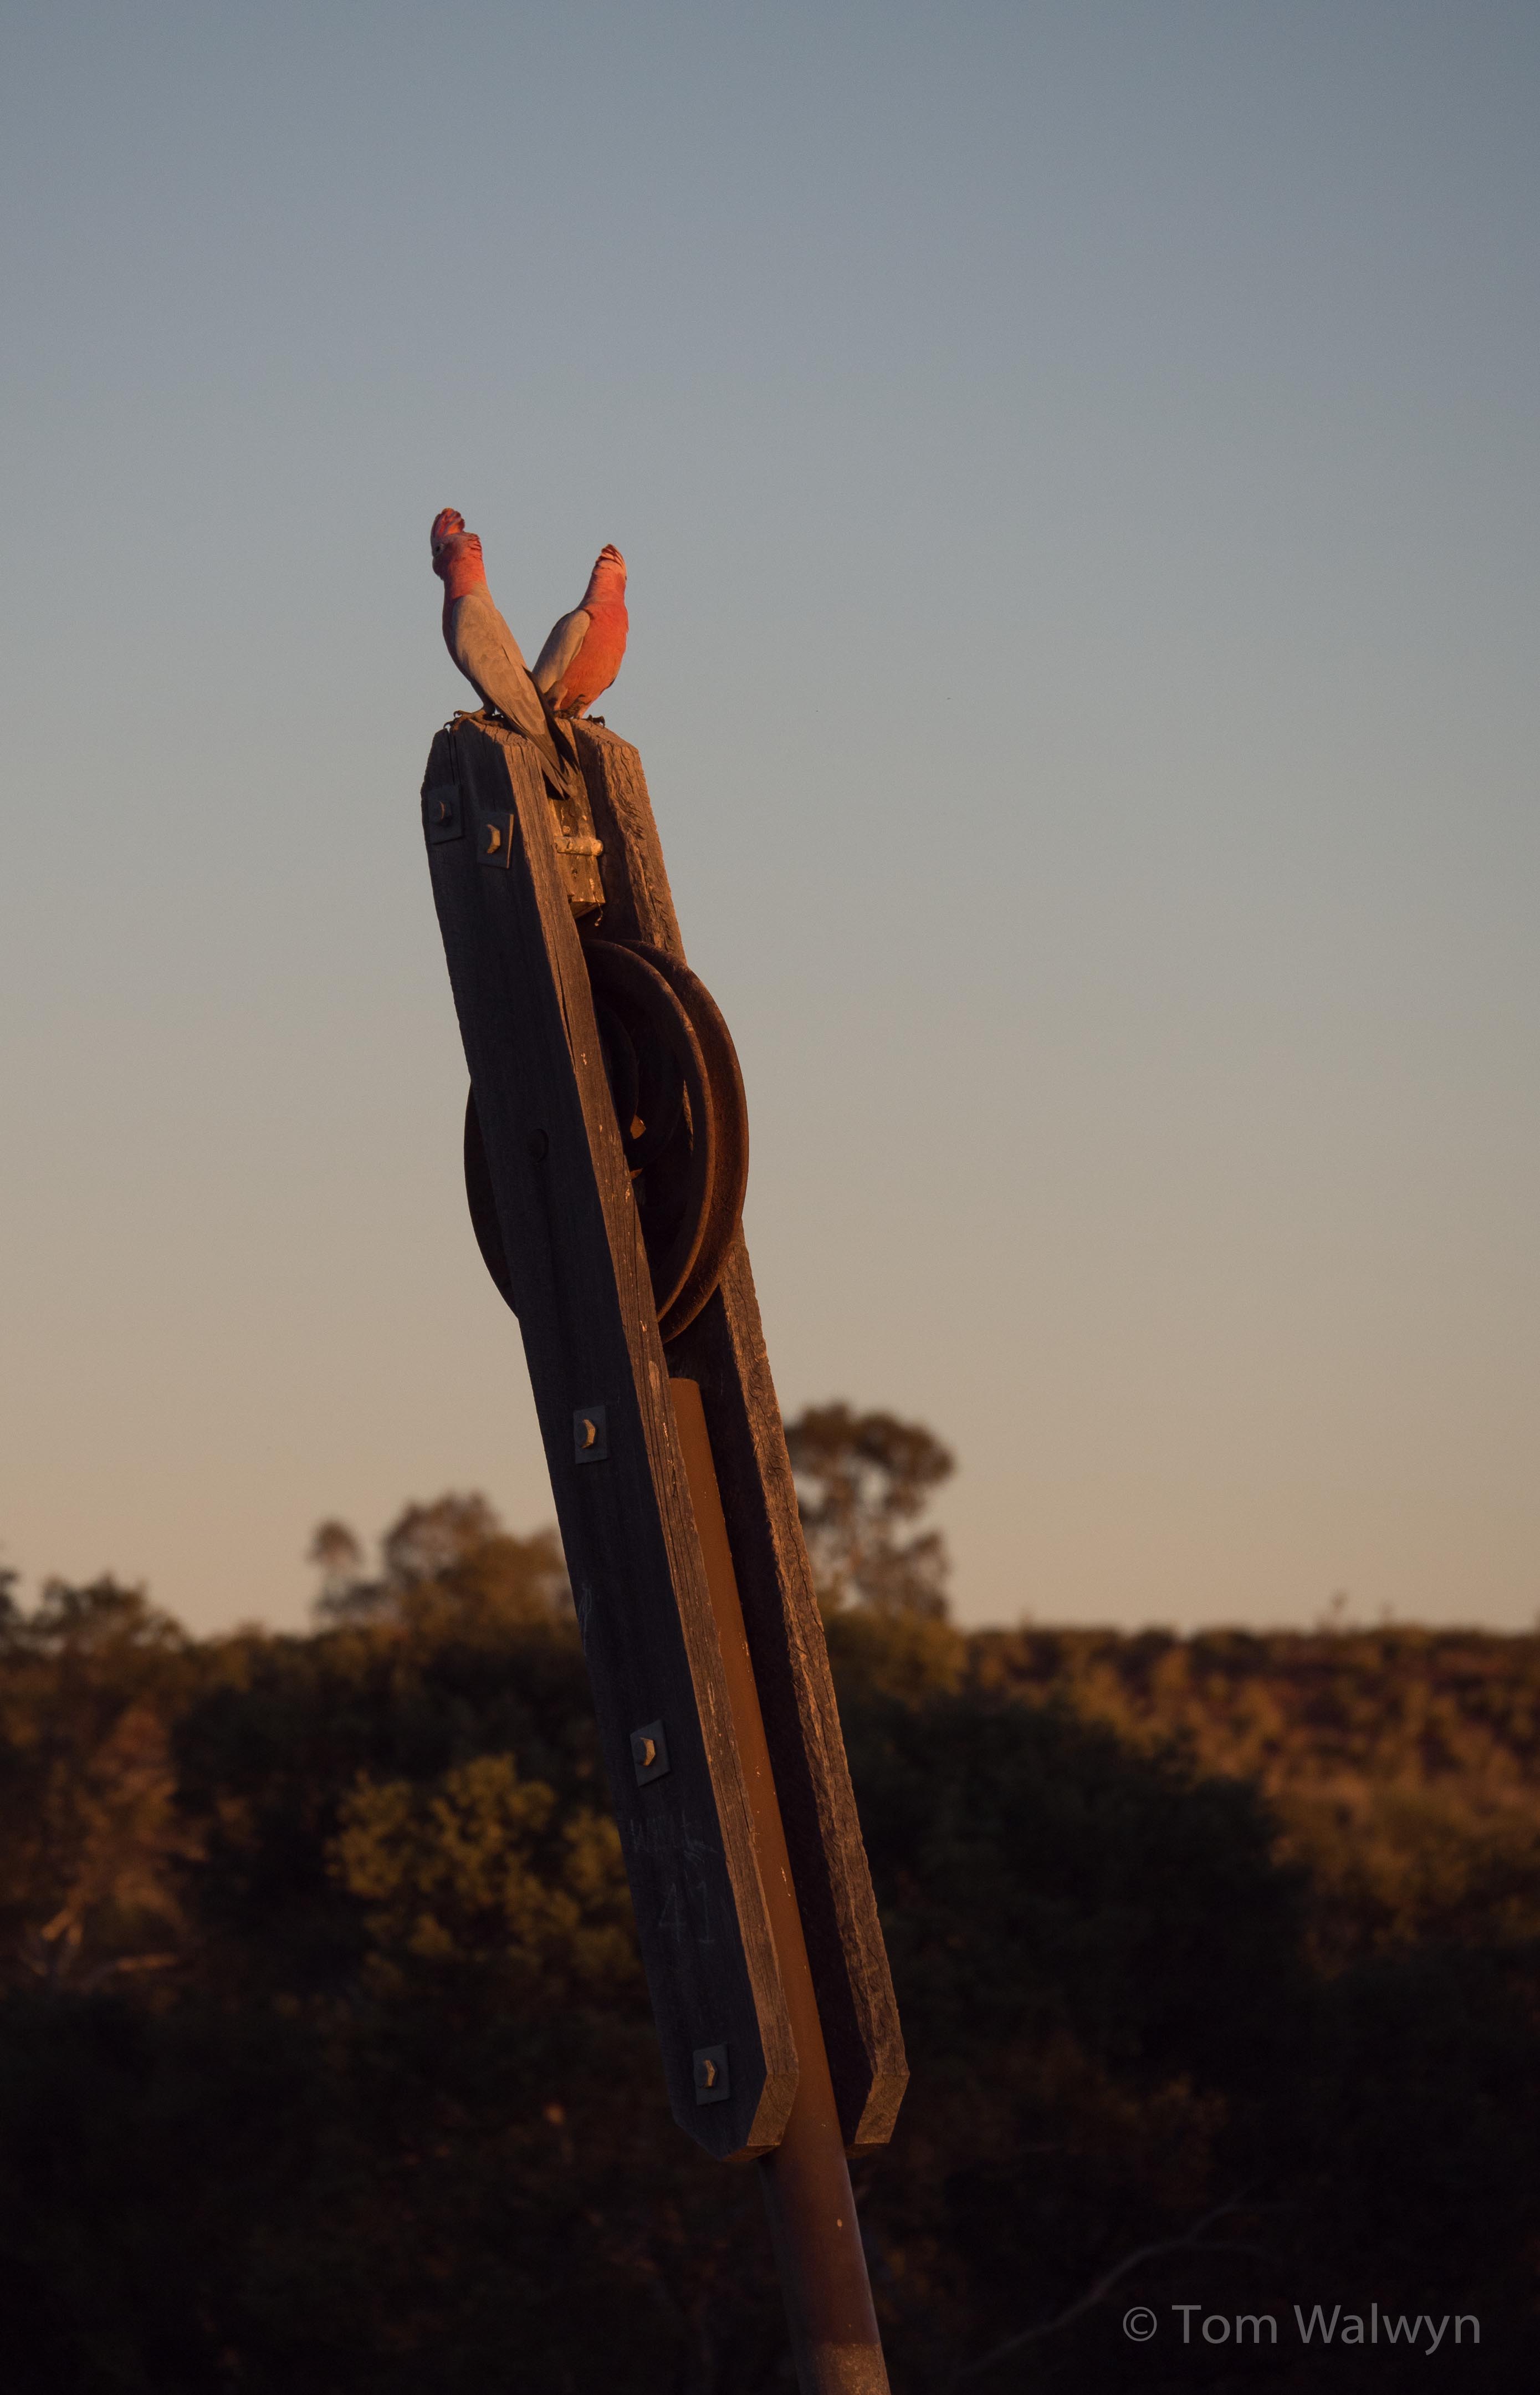
- Panasonic 35-100mm f/2.8 zoom lens + circular polarising filter
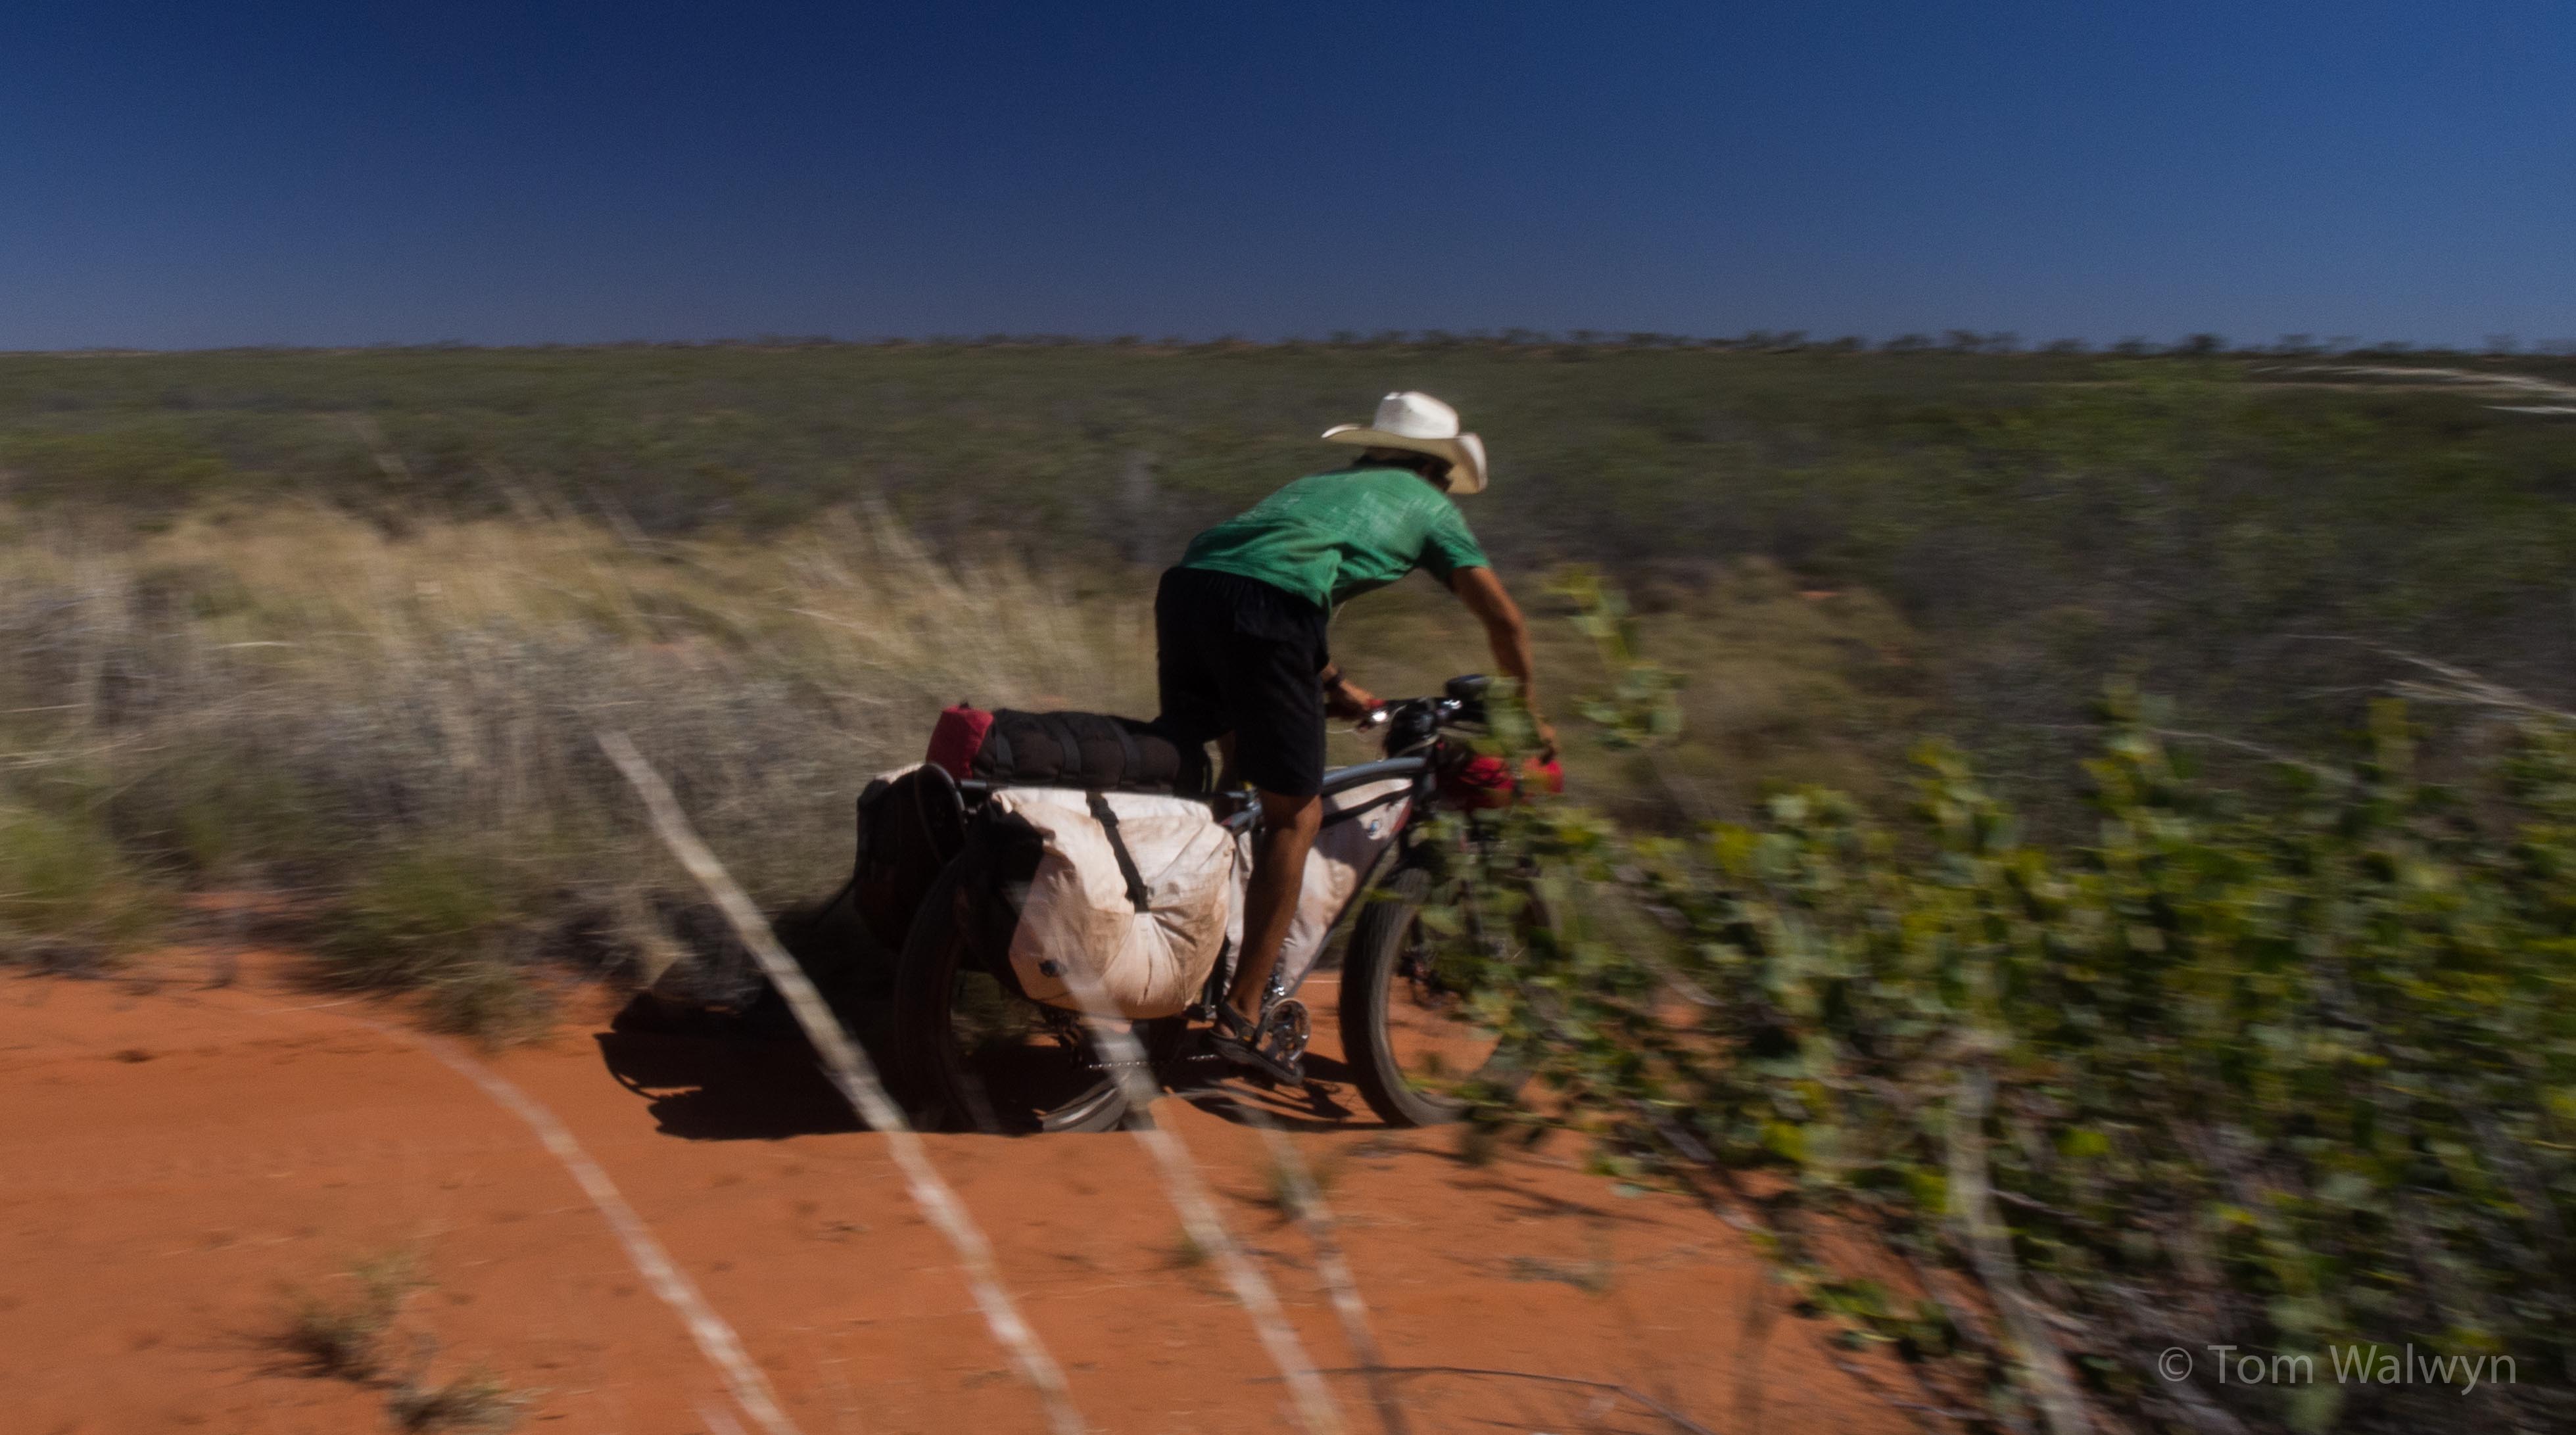
- Olympus 12mm f/2.0 prime lens + circular polarising filter
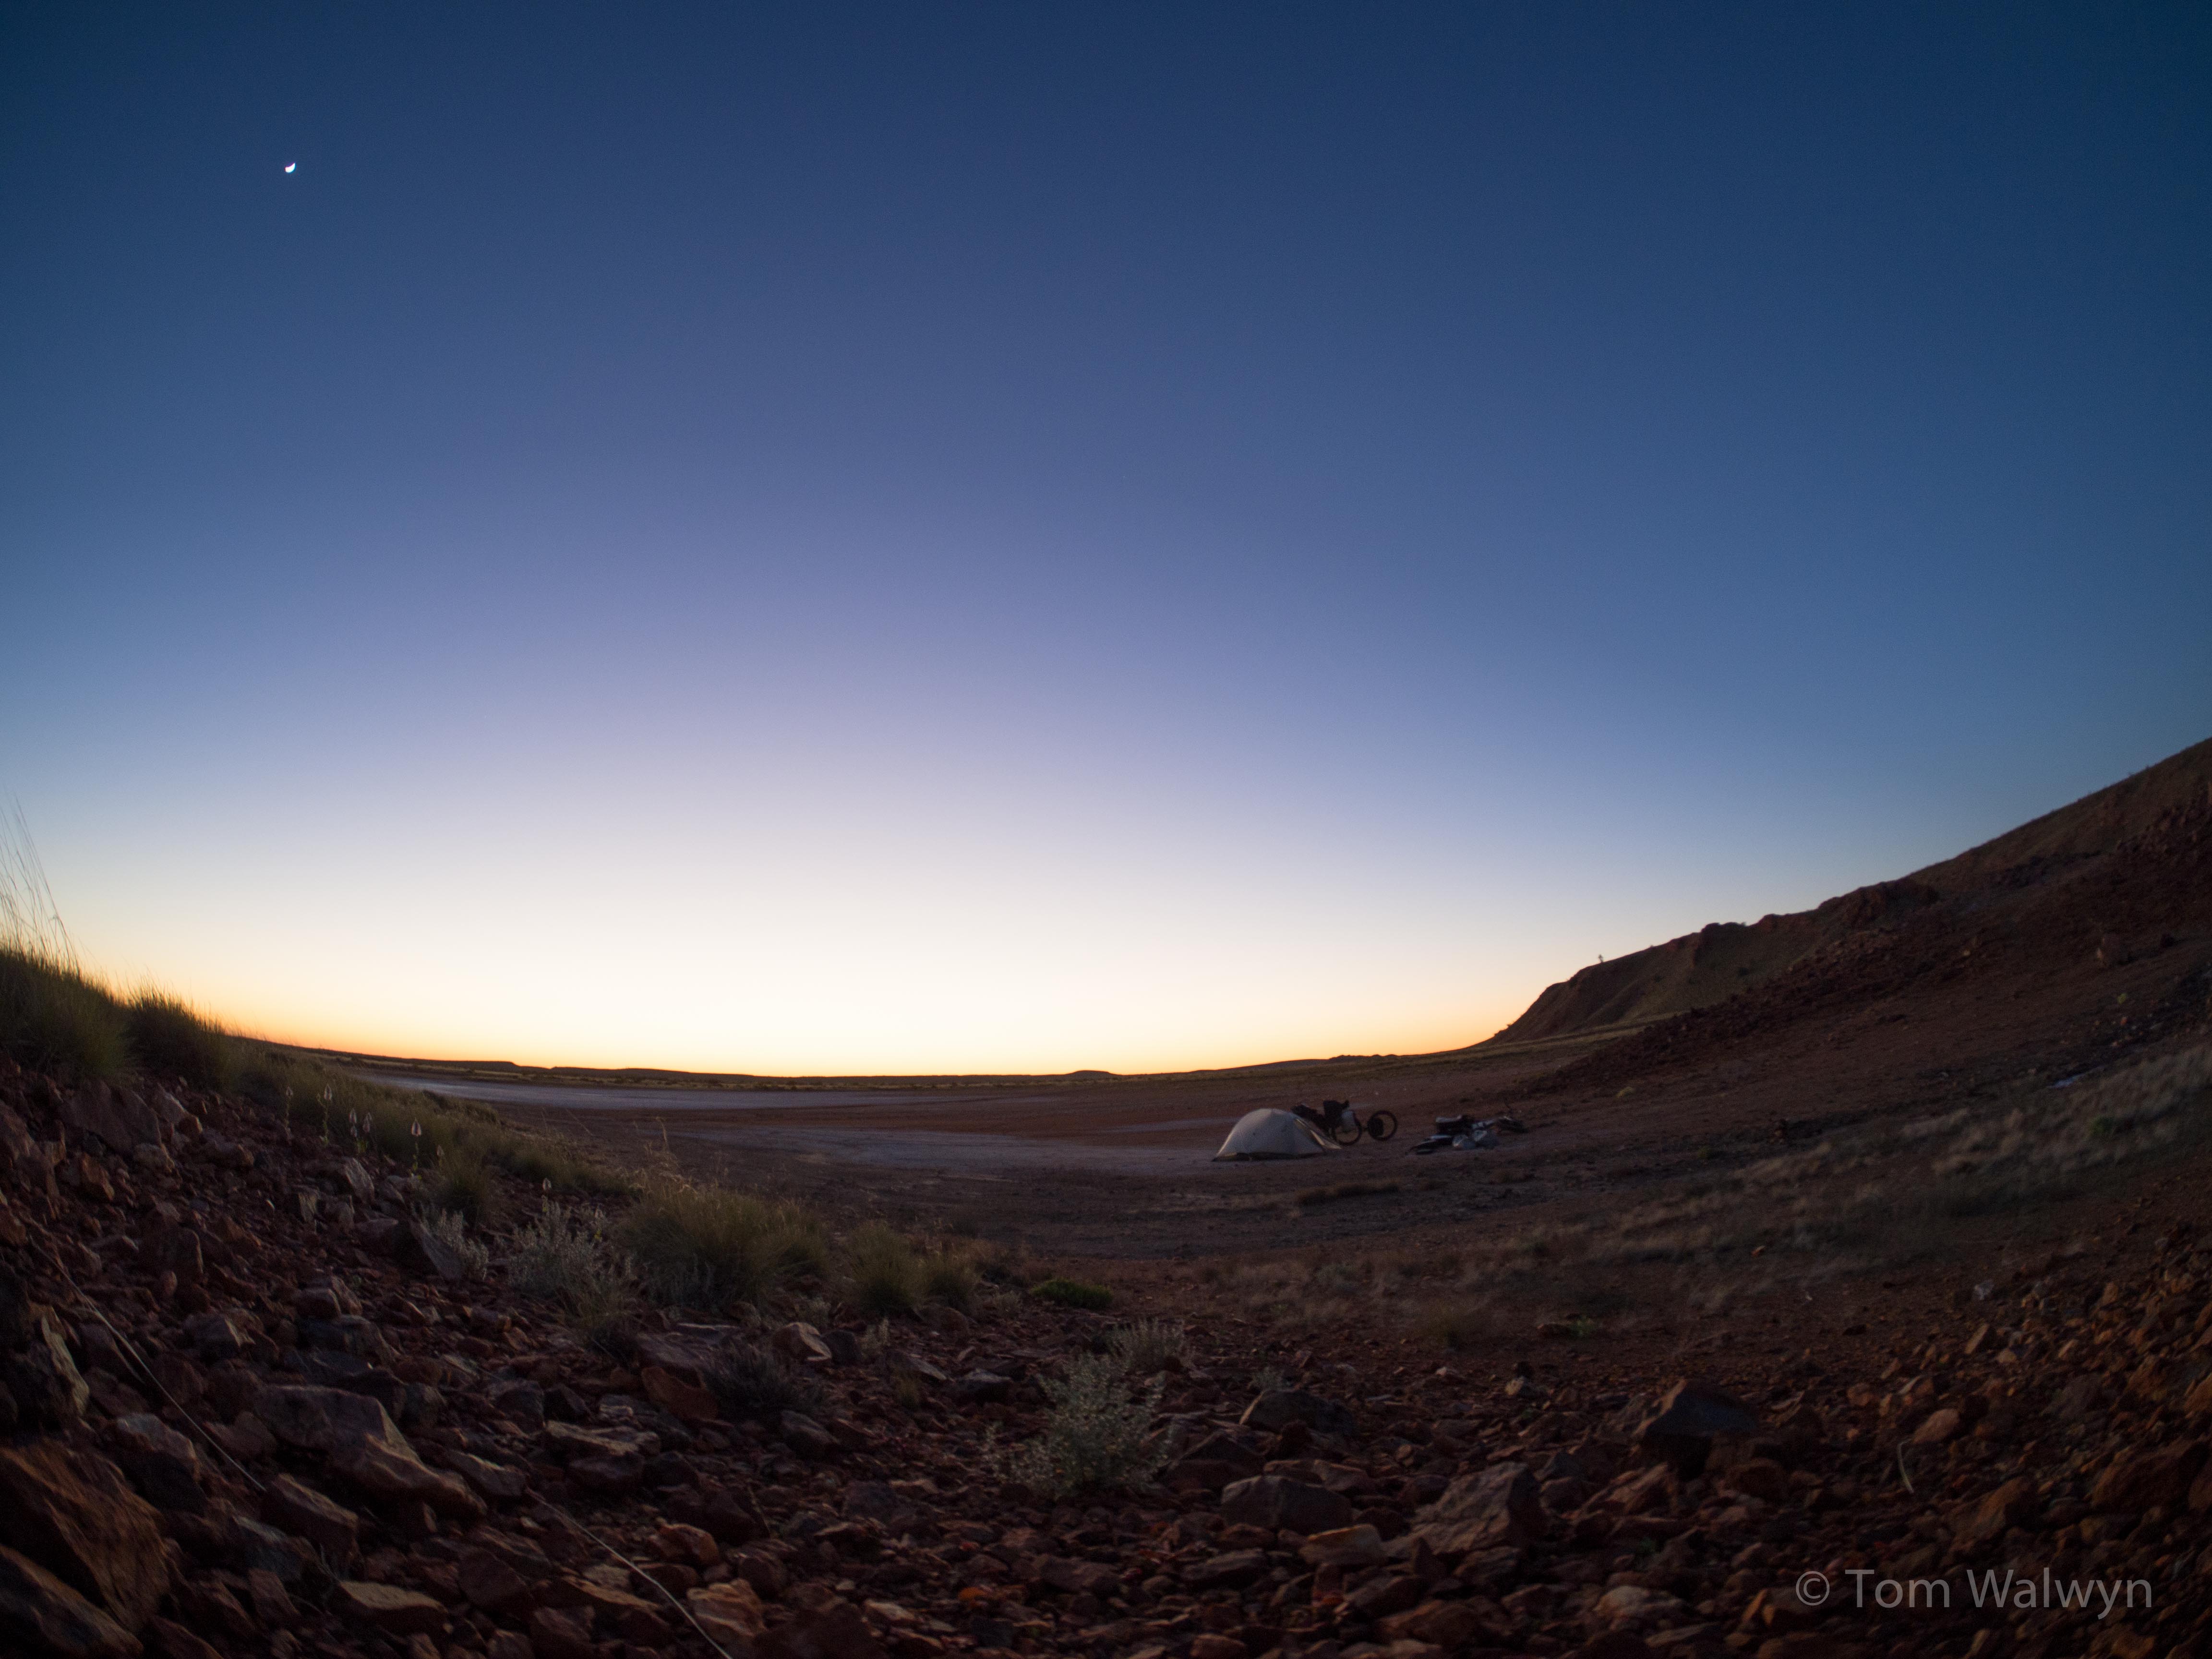
- Rokinon 7.5mm fish-eye lens
- Gorilla Hybrid mini-tripod
- Bamboo/cane home-fangled ball-head monopod*
- Filters (C-PL x 2, 6 stop ND filter* for 12mm lens and 10 stop ND filter* for zoom lens)
- 1 x Olympus BLN-1 battery, plus 1 x third party BLN-1 batter with car charger cradle plus lead
- Brunton Solaris 12 solar panel with female ‘car charger’ output
*not used
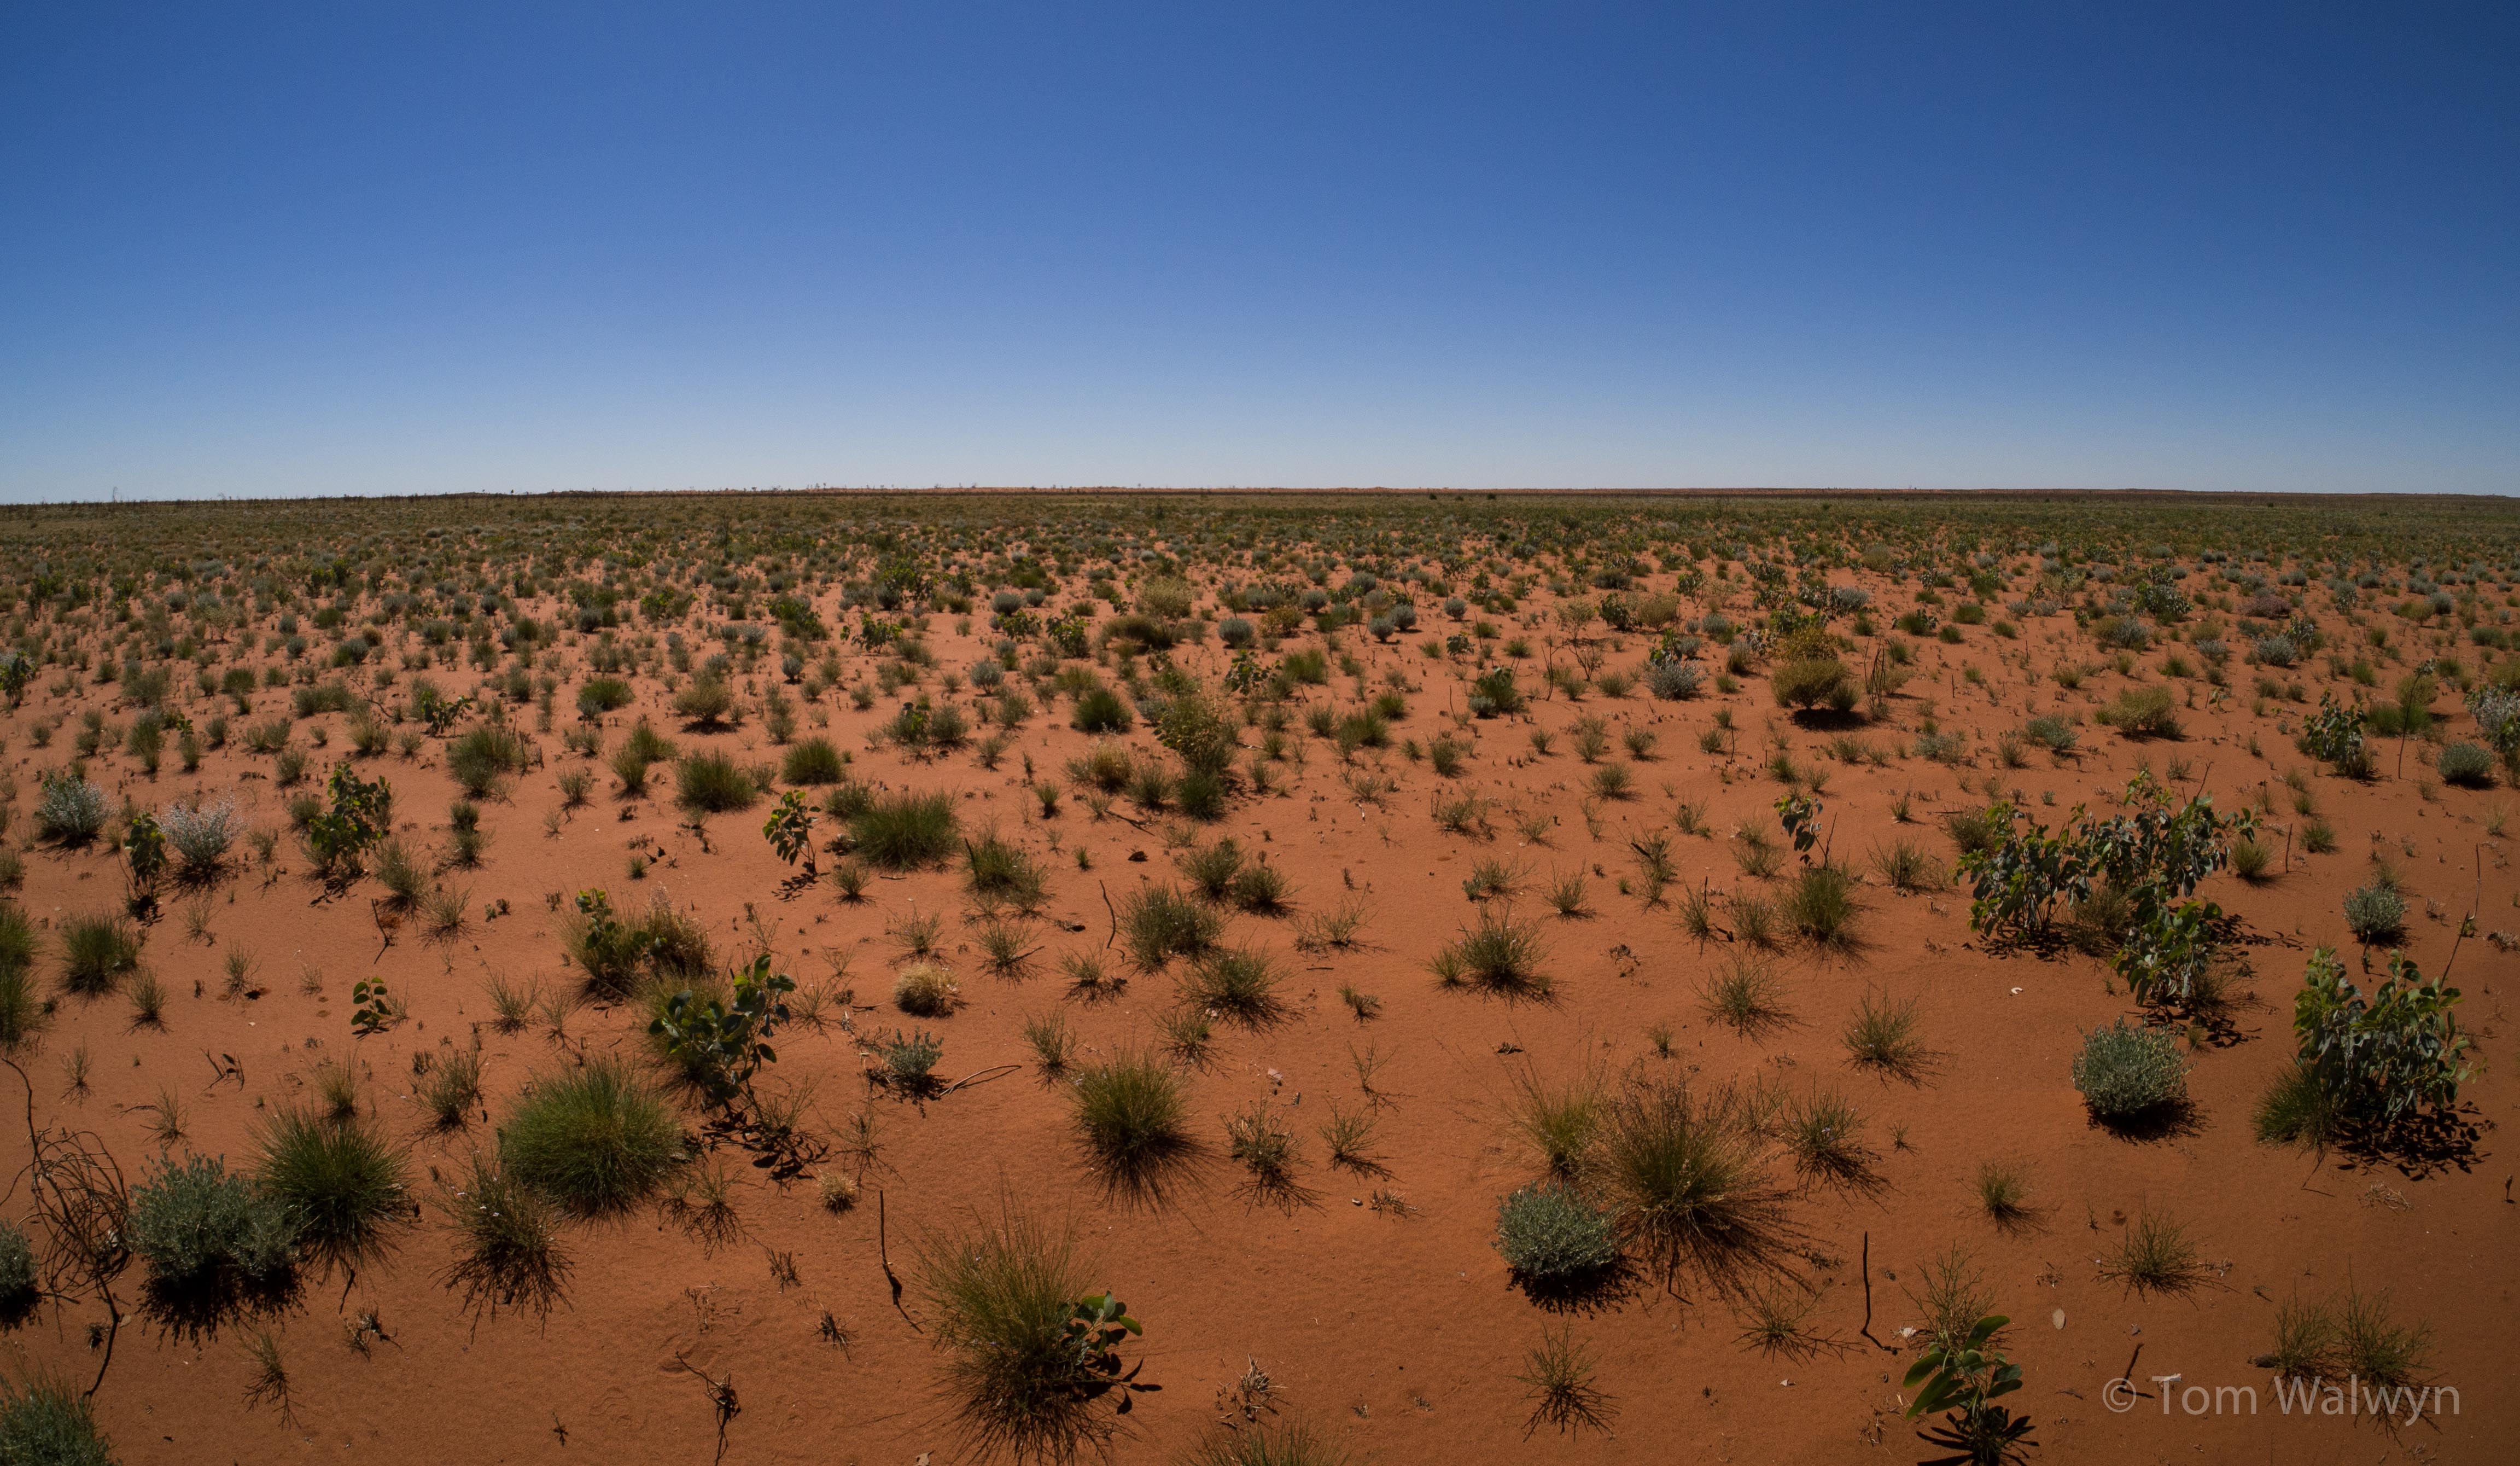
Before I offer some sort of critique, here are some photographs that demonstrate each lens:

Observations:
- Third-party BLN-1 batteries and their car chargers aren’t up to being bashed around in my bar-bag (or they’re worse than that). That battery charged once only on the cradle before the cradle gave up the ghost (appeared to be a loose connection). In future, unless someone can come up with a robust BLN-1 car charger, I’ll bring a ‘proper’ fully charged battery per 5-7 days riding (more if cold). I was rescued by Mike, a 4WDer in Kunawarritji who had an EM-5 and the ‘proper’ Olympus charger allowing me to fully charge my single olympus own-brand battery – this lasted 8 days and 300 shots.
- The single solar charge of the 3rd party battery that did work took 3-4 hours.
- The Olympus OMD EM-5 can be set up to improve battery usage – particularly to minimise use of the touchscreen monitor. I solely used the viewfinder, and only occasionally reviewed photos after taking them.
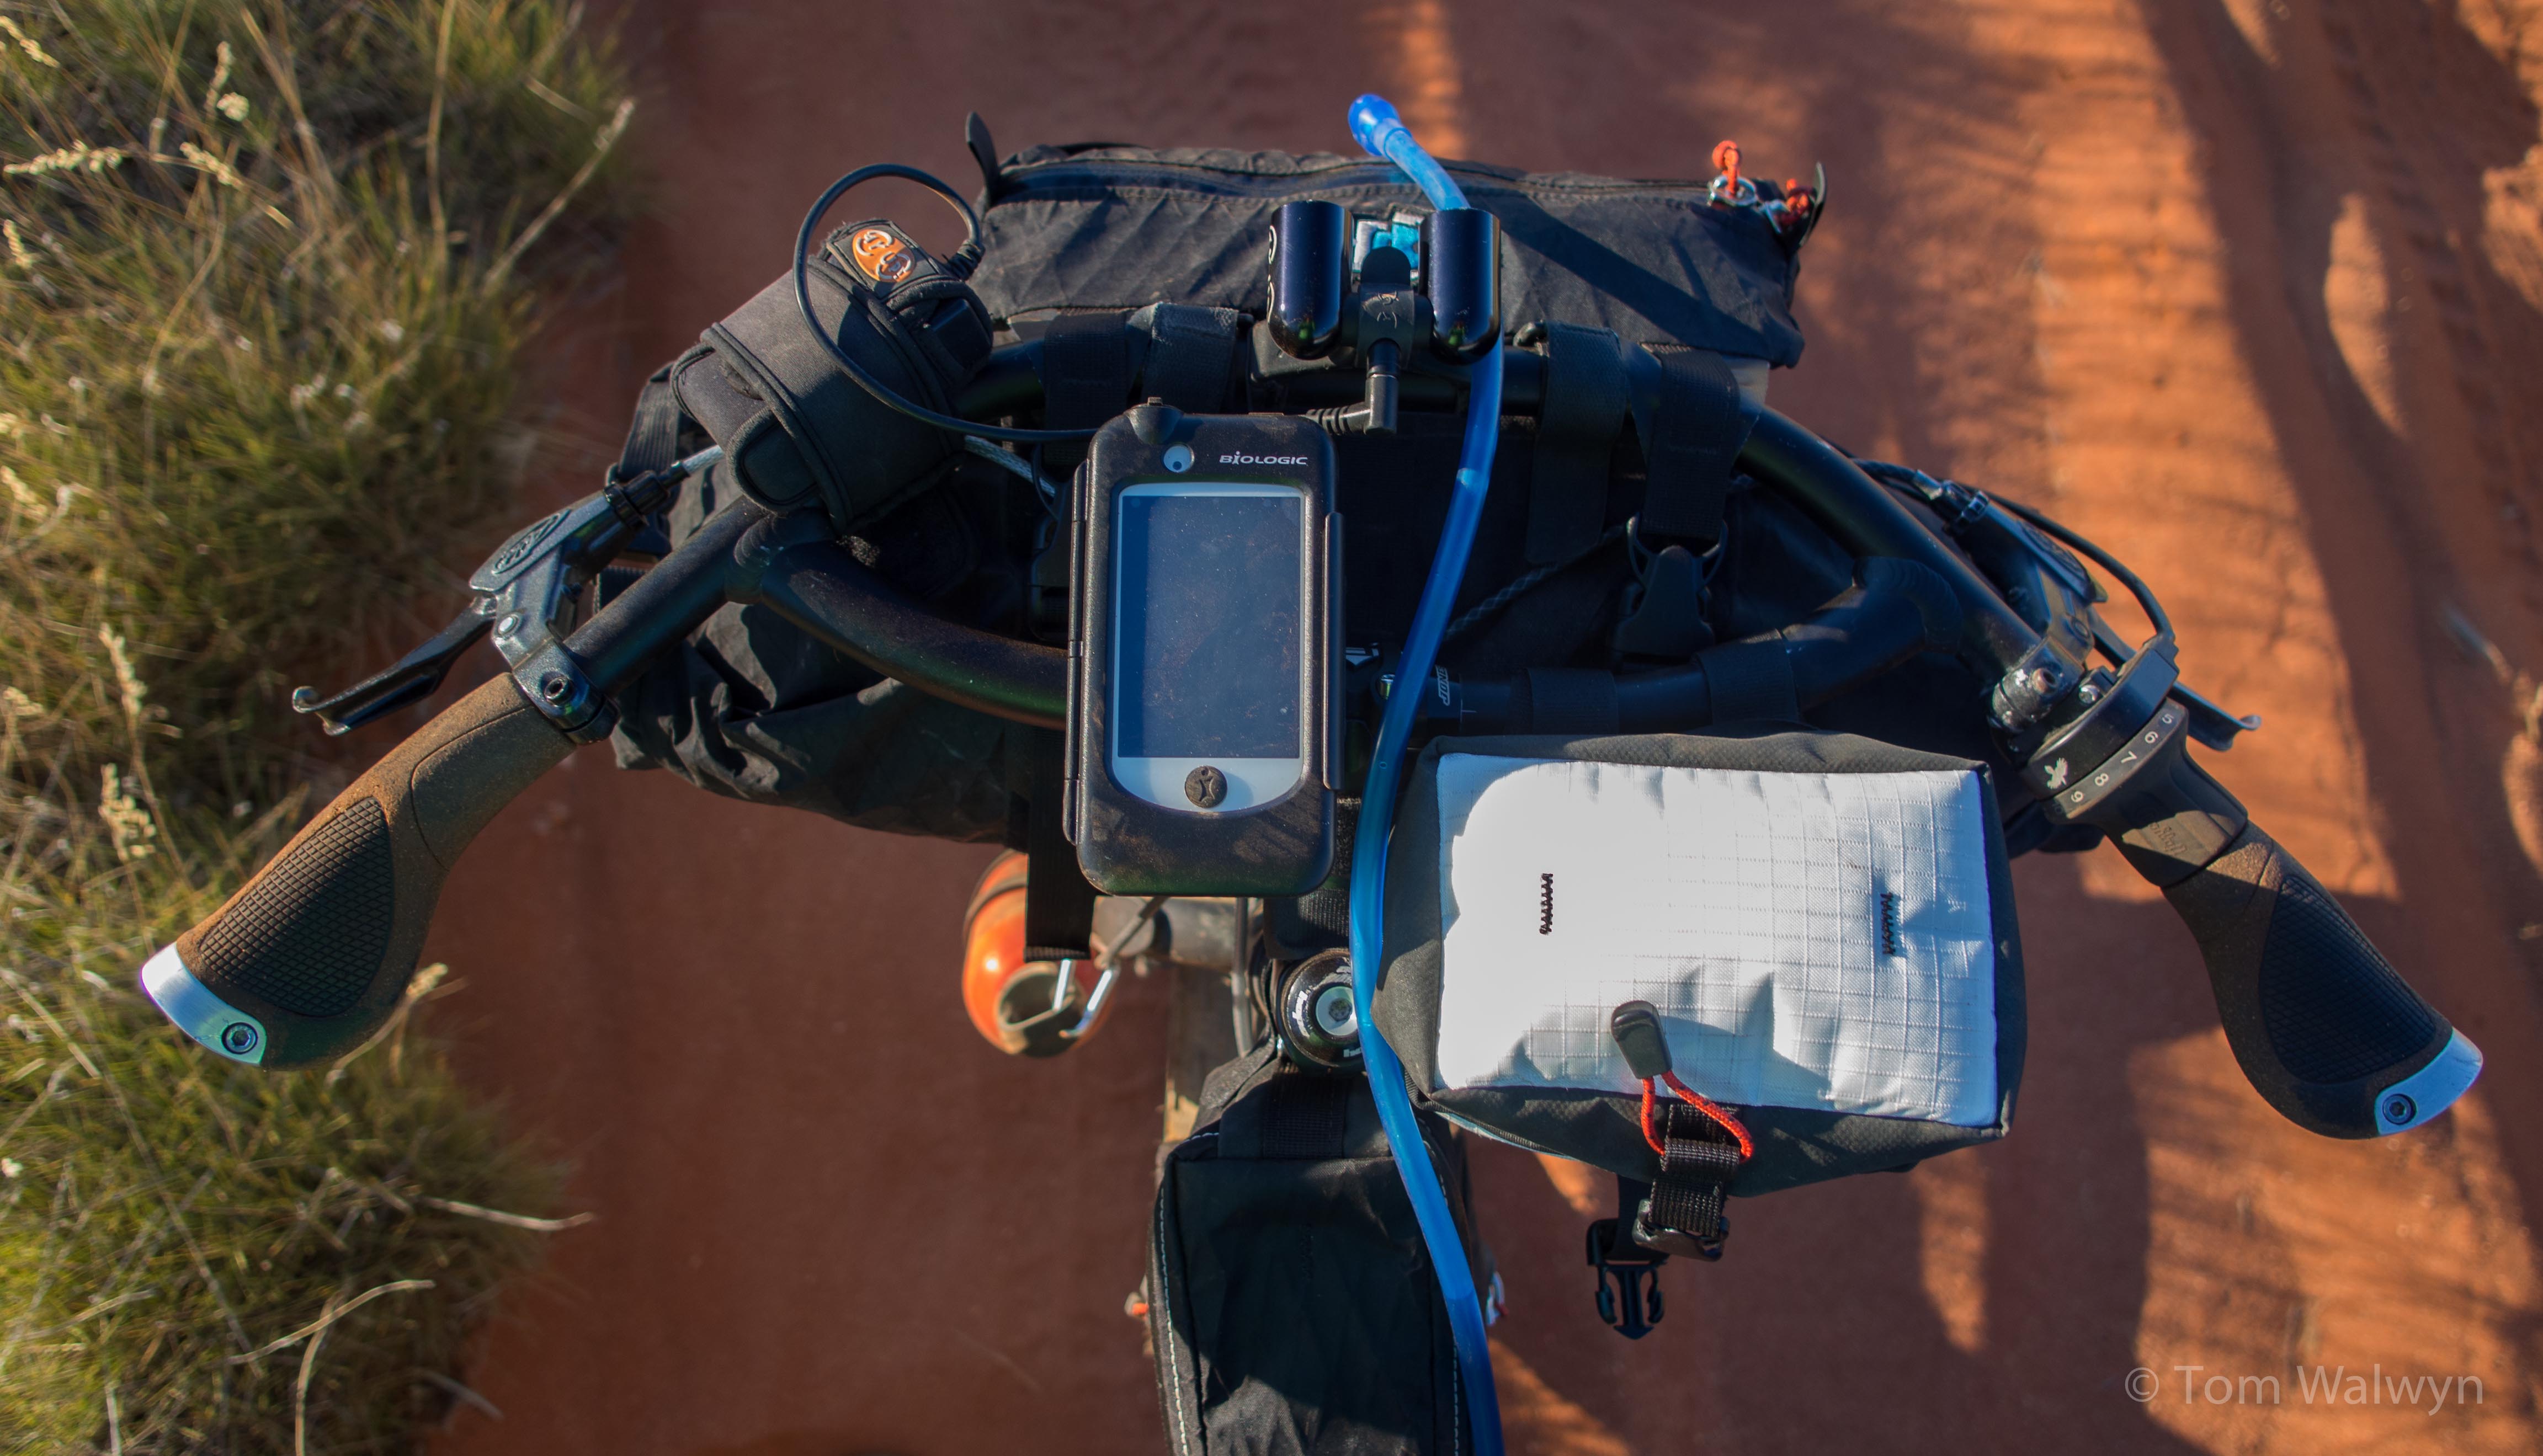
- The camera didn’t overheat (despite temperatures around 40 degrees celsius at times), though my iPhone did (in black plastic bar-mount case, and used for back-up navigation and music sanity-control over the corrugations)
- The riding on this route is too bouncy to do handheld ‘riding action shots’ – the fangled monopod could have been left behind, though the piece of cane did a fine job propping my bike up at camp. A Go-Pro set-up would have worked, but this was not really an ‘adrenaline route so I didn’t regret not having one.
- I didn’t regret including any of the lenses. Changeovers worked, and they didn’t get too dusty – either on the camera or in the lens bag.
- The Gorilla Hybrid mini-tripod did fine, though with the Panasonic zoom it wouldn’t have managed much wind.
- Good quality circular polarising filters are a must in these bright conditions. I needn’t have brought the neutral density filters as I didn’t have the battery power to do time-lapse or star-trail stuff.
Some more examples:


I have made a Flickr set of a selection of CSR photos – please feel free to explore.

[…] Canning Stock Route: Photography. […]
Looks like you chose a lens package that offered a really good variety of shots – from Fish Eye to Tele. They came out great, nice work! That 35-100 looks is particularly nice…
I’m kind of surprised though, even with the solar panel, that you only took 2 camera batteries, given that the EM5 only offers 300 shots per charge – compared to, say, 1000+ on a DLSR. I’m battery phobic. I carry two DLSR batteries – not always needed, but good for peace of mind! The weight of an extra battery always seems minimal compared to loosing shots, or the hassle of needing to be continually charging.
Great insights and photos, thanks.
Cass – there were some aspects of my packing that were decidedly last minute! On of the disadvantages of working until the last minute and leaving from the front door is the lack of the pre-flight checking session. I’m actually lucky I had more than one battery! As you’ll see in my comments, that’s not the way I’d do it next time :-). The 35-100 f/2.8 is a very fine lens indeed. It was the one that stayed attached to the camera – the subjects suitable for the other lenses were by their nature slower moving and not fleeting one-shot-only.
Same with me. When I’m riding with people, the 70-200 stays on the camera all the time. Especially if they’re speedy riders (a la PR)!
Nice one.
You’d feel at home in the Kalahari Desert where the latitude and mode of formation of the desert are similar to CSR. The only diff is we have bushmen while you have aboriginals
http://en.wikipedia.org/wiki/Kalahari_Desert
I have struggled to like my OMD. Until I updated the firmware and used the batteries a few times each, I was getting less than a day and sometimes less than 50 shots per charge. I also find that I struggle to make the camera do what I want it to. It is much better since I put tape on the function dial and disabled buttons, but it isn’t perfect. I still may decide to sell it and get a panasonic GX7 since I know I like the Panasonic ergonomics. I also want a way to charge it with my solar panels, I guess if I get a 3rd party charger, I should redo all the solder joints and then epoxy everything in place.
I feel your pain where it comes to being the slower of a twosome. Our Chilcotins trip had me travelling at turtle speed and so I pretty much only had the opportunity to photograph from behind.
The OMD EM5 is definitely a camera that grows on you, rather than being love at first ‘touch’. I find the size and location of some of the buttons fiddly at best – particularly the F1 and 4-way control. I’ve got the other controls set to what I use, and some other settings to reduce battery use – I found the automatic swap between EVF and rear screen annoying, so it’s now set to manual using the button on the right side of the EVF. This dpreview page was quite helpful with some other settings (http://www.dpreview.com/articles/9115179666/user-guide-getting-the-most-out-of-the-olympus-e-m5).
Ergonomically I like the look of the upcoming EM-1 (see m43rumors.com), but won’t swap as now I’ve got accustomed to the EM-5 (and have the battery grip) it’s not enough of an upgrade to justify the money.
I’m getting another 3rd party battery charger from BH, in a final effort to find a better made, more robust one. It’ll be a while before I can feed back on that though.
I much prefer ‘candid’ shots, rather than having to direct my subjects – being the slower just means I need to get used to being a bit more assertive and premeditated with it all.
Oh My Darling, great choice of camera!
I got one of the first batch of OMDs to arrive in UK, but supplies of spare batteries took a while to catch up, so with a trip to Ladakh to come I bought some third-party (Expro brand) substitutes. Since the Oly charger won’t output to anything that doesn’t have an Oly chip in it, also needed the Expro charger, which nevertheless charges the Oly battery and proved to be a blessing in disguise.
When I realised there would be ten days without mains power in Ladakh, I wasn’t convinced three batts would be enough. Fortunately I have a hub generator wheel for my bike already, so I got a Busch & Mueller E-Werk. On this AC-DC transformer you can dial in whatever output voltage you want up to 13V, so I planned to run the third-party charger via its 12V car lead. But looking at the charger’s modular construction, with different battery holders clipping onto a standard charging base, I noticed just two contacts under the holder marked ‘8.4V’. The E-Werk voltage dial has a position marked 8.4V. So I dismantled the battery holder (easy) and soldered one of the E-Werk’s spare leads into it (fairly easy), thus cutting out the middleman charger base and saving the inevitable losses of its control electronics.
Considering the inherent power limitations of a cycle lighting generator and with the E-Werk current limit set to 0.5A, I wasn’t too worried about frying a battery. On test runs I found that 3hrs of steady riding provided a full charge, and so it was on the tour. I recharged two or three times that trip with no problems.
Although Himalayan highway 21 was pretty rough, I’m glad to say the Expro batteries and charger are still working fine after that and several subsequent (European) cycle tours, so I think this simple, compact, efficient and lightweight charging system is probably adequate for most purposes. I guess the outback must be rougher!
Chris
I’m very interested in your dynamo-based system. I had considered a dynamo hub for the CSR trip, but was put off by the lack of a non-fanged (spacers) 135mm SON hub. I wasn’t sure whether the SON, even if I used a 100mm fork (thus removing my option of swapping trailer and front wheels in event of need), would be up to the corrugation and general off-road pounding. I’ve since heard tell of people doing comparable stuff with dynamo hubs and would be interested in giving it a go. Given the amount of sunshine on the CSR, and the ability to charge without moving, I went with Solar. However, my technical expertise is mainly in bicycles (and humans) rather than electrics. This together with a lack of time for testing, meant that I probably made simple errors with my set-up. I was also very much attracted by being able to charge the camera battery directly, and not need to carry a (heavy) secondary battery with an output sufficient to charge the camera battery. Our pace (10km/hr) average on the CSR which was actually 2-3km/hr faster than I was expecting might still not be fast enough to be useful via dynamo? I’d be very interested in your comments on this issue particularly, as now that SON make a 135mm spaced dynamo hub, I’m looking at this more seriously for ‘the next one’.
Tom
I’m also impressed by the ‘cut out the middle-man’ use of the modular charger – tempting :-)
Hub generators are designed to produce a useful output down to walking pace, so although power delivery falls with decreasing speed, it does not go off a cliff. And as any touring cyclist knows only too well: slow going means you’ll be riding for longer. So although you’ll be getting less energy per unit time, there WILL be more time!
Rather than counting the hours, it’s probably more sensible to think in terms of how many kilometres it takes to charge a battery, since that’ll be more of a constant and knowable quantity. To determine how far you must ride, to fully revive a dead battery, first time how long it takes to do that from the mains. Flatten the battery again, and go ride steadily for one or two hours, charging it directly from the E-Werk, with voltage and current limits set according to the instructions with regard to the voltage and capacity of the battery. Upon return, put the battery in the mains charger and time how long it takes to top it up to full. Distance for a full charge = distance ridden × full charge time / (full time minus top-up time).
But it isn’t really worth riding that far. The charging of Li-Ion batteries becomes much less efficient as they approach full. Half the time or distance will give you an 80% full battery. If you’re plugged in the mains and have the leisure to wait for the final trickle, just do that! But when charging comes at the cost of your own time and effort, it makes better sense to stop at half-time/distance and load another empty battery into the charger.
[…] already described the photography-related electronic issues, but will summarise them here […]
[…] A large draw of the Canning Stock Route was the sheer space we'd be riding through. Latterly in the 2 year run-up to this trip it's fair to say that the prospect of trying to communicate the count… […]
Hi, thank you for sharing your fantastic experience!
A question on the lenses choice: didn’t you miss focal range from 24mm (eq.) to 70mm (eq.), which is so routinely made use of that many consider a 24-70mm zoom as first choice for glass?
Ciao!
Anfy
I did sometimes want to use some of the range in between ’24’ and ’70’. I own the 25mm f/1.4 Panaleica as well, but in the interest of space and weight didn’t bring it. I have my eye on the new Olympus 12-40mm f/2.8 Pro – particularly as I like the focus ring change to manual focus, with weather sealing (vs the 12mm f/2.0). I’ll see how the reviews of this go and maybe take the plunge (possibly in part-exchange for my 12mm) later in the year. That would give me the two zoom lenses as my core kit.
Thank you for your comments :-)
Tom
Great post and I really enjoyed the piece in Bunyan… inspiring stuff. Like you, I wanted a lighter weight outfit for travel and invested in an Olympus EPL-1 (picked up as an end of run bargain). It’s OK, but I really miss the viewfinder and will need to add a hotshoe unit and a better quality, prime wide angle lens.
Thank you for your enjoyment :-)
I really like the 12mm f/2.0 prime (24mm FF equivalent), but they aren’t cheap.
The EVF on the EM5 does work well, and also helps save battery life in the context of the BLN-1 batteries that it and the new EM1 use.
It may be that the new 12-40mm f/2.8 Olympus zoom proves to be a good cover-all lens – but again is expensive and more bulky than the 12mm.
Hope you find a solution.
Tom
Always worth spending a bit more dough on the lenses though :-)